If you’ve ever wondered about the step-by-step process for removing and reinstalling a ladder rack when the need arises, we’ve got you covered. Understanding the ins and outs of this procedure can save you time, effort, and potential frustration. Whether you’re looking to replace your ladder rack or need to temporarily remove it for a specific task, knowing the correct process ensures a smooth and hassle-free experience. So, let’s dive right in and explore the systematic and straightforward steps to remove and reinstall a ladder rack whenever necessary.
Preparation
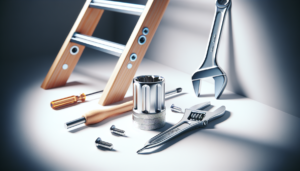
Before you begin the process of removing or reinstalling a ladder rack, it’s important to gather all the necessary tools. You’ll typically need a socket wrench, screwdriver, and pliers. Make sure you have these handy before starting the task.
Next, take some time to review the manufacturer’s instructions for your specific ladder rack model. The instructions will provide you with important details and steps that you need to follow. Familiarize yourself with the instructions and any safety precautions mentioned.
It’s also essential to inspect the ladder rack for any damage or wear. Look for any signs of rust, corrosion, or bent components. If there are any issues, it’s important to address them before proceeding with the removal or reinstallation process. Safety should always be your top priority.
Removal
Now that you’re prepared, let’s dive into the process of removing a ladder rack from your vehicle. Start by securing the ladder and any tools that you’ll be using during the process. Make sure everything is within reach, and take any necessary precautions to avoid accidents.
Next, release any securing mechanisms that are keeping the ladder rack attached to your vehicle. This could involve removing any bolts, screws, or clamps that are holding it in place. Proceed with caution and ensure that you have full control of the ladder rack as you release the securing mechanisms.
Once the securing mechanisms are removed, it’s time to detach the ladder rack from your vehicle. Carefully lift the ladder rack off the vehicle, making sure to support its weight and prevent any damage to the vehicle or yourself.
Finally, store the ladder rack components safely. You can use a storage area or a designated rack for this purpose. It’s important to keep all the components organized and free from damage until you’re ready to reinstall the ladder rack.
Reinstallation
When you’re ready to reinstall the ladder rack, there are a few key steps to follow. First, confirm the compatibility of the ladder rack with your vehicle. Double-check the manufacturer’s instructions or reach out to the manufacturer directly if you have any doubts. It’s crucial to ensure that the ladder rack is suitable for your specific vehicle model.
Next, retrieve all the ladder rack components that you stored during the removal process. Lay them out in an organized manner so that you can easily access them when needed. Take this opportunity to inspect the components for any signs of damage or wear.
Position the ladder rack on your vehicle according to the manufacturer’s instructions. Make sure it’s centered and aligned properly. This step may require some adjustments, so take your time to ensure that everything is in the right place.
Once the ladder rack is positioned correctly, it’s time to secure it to your vehicle. Follow the manufacturer’s instructions for this step, as it may involve using bolts, screws, or clamps. Make sure everything is tightly secured, but be careful not to over-tighten and risk damaging the ladder rack or your vehicle.
Specific Vehicle Types
Different types of vehicles may have slightly different procedures for ladder rack removal and reinstallation. Let’s take a look at some specific instructions for trucks, vans, and cars.
Truck ladder rack removal/reinstallation
Trucks often have ladder racks that are mounted on the bed or the roof of the vehicle. The removal and reinstallation process for truck ladder racks is typically similar to the general steps mentioned earlier. However, trucks may have specific attachment points or brackets that need to be taken into consideration. Refer to the manufacturer’s instructions or consult with a professional if you’re unsure about the exact procedure for your truck model.
Van ladder rack removal/reinstallation
Vans often have ladder racks attached to the roof or side of the vehicle. The process for removing and reinstalling these ladder racks is generally similar to other types of vehicles. However, vans may have different attachment methods and brackets, so it’s important to refer to the manufacturer’s instructions or seek professional advice if needed.
Car ladder rack removal/reinstallation
Cars may have smaller ladder racks designed for lighter loads. The process for removing and reinstalling a ladder rack on a car is similar to other vehicles, but the specific attachment points and procedures may vary. Always follow the manufacturer’s instructions and consult with professionals if needed.
Common Challenges
During the process of removing and reinstalling a ladder rack, you may encounter some common challenges. Let’s take a look at a few and how to overcome them.
Rust or corrosion
If you notice rust or corrosion on your ladder rack components, it’s important to address it before proceeding. Use a rust remover or sandpaper to clean off the affected areas. Apply a rust-inhibiting primer and paint to prevent further corrosion. If the rust or corrosion is severe, consider replacing the affected components.
Stuck or jammed components
Sometimes, ladder rack components may become stuck or jammed, making it difficult to remove or reinstall them. Applying a lubricant, such as WD-40, can help loosen the components. Gently tap or wiggle the stuck parts to free them. If the issue persists, consult with a professional for assistance.
Difficulty aligning holes and brackets
Aligning holes and brackets can be challenging, especially if the ladder rack has multiple components. Take your time and ensure that all the holes line up properly. If necessary, slightly adjust the position of the ladder rack or the attachment points to achieve proper alignment. Avoid forcing or tightening bolts if the holes aren’t aligned, as this may damage the components.
Remember, patience and caution are key when dealing with common challenges during the ladder rack removal and reinstallation process. If you’re unsure or uncomfortable, it’s always best to seek professional assistance.
Safety Precautions
When removing and reinstalling a ladder rack, it’s essential to prioritize safety. Here are a few key safety precautions to keep in mind throughout the process:
Use proper lifting techniques
Ladders and ladder rack components can be heavy, so it’s crucial to use proper lifting techniques to avoid straining your back or causing injury. Bend your knees, keep your back straight, and lift with your legs. If the ladder rack is too heavy for you to lift alone, ask for assistance.
Wear appropriate personal protective equipment
Protect yourself by wearing appropriate personal protective equipment. This may include gloves to protect your hands, safety glasses to shield your eyes, and sturdy footwear to prevent injuries. Additionally, consider wearing a helmet if there’s a risk of falling objects during the removal or reinstallation process.
Avoid exceeding weight limits
Ladder racks have weight limits that shouldn’t be exceeded. Overloading the rack can compromise its stability and increase the risk of accidents. Make sure to check the weight limits specified by the manufacturer and adhere to them strictly. If you need to transport heavy items, consider using a different method or a more suitable vehicle.
Remember, safety should always be your top priority when working with ladder racks. Take the necessary precautions to protect yourself and others around you.
Maintenance and Inspection
Proper maintenance and regular inspections are essential to ensure the longevity and safe use of your ladder rack. Here are some maintenance and inspection tips to keep in mind:
Clean ladder rack regularly
Keeping your ladder rack clean can help prevent rust, corrosion, and other issues. Regularly remove dirt, debris, and any other buildup from the rack. Use mild soap and water to clean the components, and avoid using abrasive cleaners that may damage the finish.
Inspect for loose or damaged parts
Regularly inspect your ladder rack for any loose or damaged parts. Check for loose bolts, screws, or clamps and tighten them if necessary. Look for any signs of wear, such as bent or cracked components, and replace them promptly. Taking care of small issues early on can prevent more significant problems down the line.
Replace worn-out components
Over time, ladder rack components may become worn out and less reliable. If you notice any signs of wear, such as weakened metal or fraying straps, it’s important to replace those components. Using worn-out parts can compromise the stability and safety of your ladder rack.
By regularly maintaining and inspecting your ladder rack, you can ensure its durability and safe use for years to come.
Professional Assistance
While many ladder rack removal and reinstallation processes can be done independently, some situations may require professional assistance. Here are a few instances where it’s advisable to seek help:
Contacting a professional installer
If you’re unsure about any aspect of removing or reinstalling a ladder rack, contacting a professional installer can provide the expertise and experience needed to complete the task safely and efficiently. They can guide you through the process, offer advice, or even handle the entire installation for you.
Seeking advice from the manufacturer
If you encounter any difficulties or have specific questions about your ladder rack, don’t hesitate to reach out to the manufacturer. They have the expertise and knowledge of their product and can provide valuable guidance and support. Contact their customer service or consult their website for assistance.
Utilizing installation services
If you’ve purchased a ladder rack from a retailer, they may offer installation services. Consider utilizing these services if you’re unsure about the removal or reinstallation process. Professional installers can ensure that the ladder rack is correctly installed, minimizing the risk of errors or accidents.
Remember, there’s no shame in seeking professional assistance when needed. Your safety and the proper installation of your ladder rack are paramount.
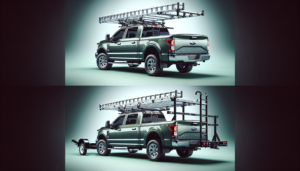
Benefits of Removing a Ladder Rack
While ladder racks are incredibly useful for transporting ladders and other long items, there may be instances where removing the ladder rack can be beneficial. Here are a few advantages to consider:
Improved fuel efficiency
Ladder racks can create additional wind resistance, which may impact your vehicle’s fuel efficiency. By removing the ladder rack when not in use, you can reduce drag and potentially improve your vehicle’s fuel economy.
Reduced wind noise
Ladder racks can create additional noise as air passes through them while driving. This can be particularly noticeable at higher speeds. If you find the wind noise bothersome, removing the ladder rack when not needed can provide a quieter driving experience.
Increased clearance for low-height areas
Depending on the height of your ladder rack, it can limit your vehicle’s clearance in areas with low overhangs or height restrictions. By removing the ladder rack, you can gain extra clearance and prevent any potential damage to the rack or your vehicle.
Removing a ladder rack temporarily can provide these benefits while still allowing for a quick and easy reinstallation when needed.
Conclusion
Removing and reinstalling a ladder rack may seem like a daunting task, but with the right tools, preparation, and knowledge, it can be a straightforward process. Remember to gather the necessary tools, review the manufacturer’s instructions, and inspect the ladder rack for any damage before starting. Take your time during the removal and reinstallation process, following the specific steps outlined by the manufacturer. Be aware of the challenges that may arise and use the right safety precautions to protect yourself. Regular maintenance and inspections will ensure the longevity of your ladder rack, and seeking professional assistance when needed can provide valuable guidance and support. Lastly, consider the benefits of removing a ladder rack on fuel efficiency, wind noise, and clearance for low-height areas. By following these guidelines, you’ll be able to safely remove and reinstall a ladder rack, making your transportation needs more convenient and efficient.