Have you ever wondered how you can install a ladder rack on your vehicle? If so, you’re in luck! In this article, we’ll explore the installation process for a ladder rack and answer the burning question: Can you do it yourself? Whether you’re a DIY enthusiast looking to save money or simply curious about the process, we’ve got you covered. So, grab your tools and get ready to learn how to install a ladder rack like a pro!
Choosing the Right Ladder Rack
When it comes to choosing the right ladder rack for your vehicle, there are a few important factors to consider. First, think about the type of ladder rack that would best suit your needs. There are different types available, such as side-mounted, overhead, or removable ladder racks. Each type has its own advantages and disadvantages, so think about how you will be using the rack and choose one that fits your requirements.
Another crucial consideration is the weight capacity of the ladder rack. You need to ensure that the rack you choose can safely hold the weight of the equipment or materials you plan to transport. Check the weight capacity specifications provided by the manufacturer and make sure it aligns with your needs. It’s better to choose a ladder rack with a higher weight capacity than you think you’ll need to ensure safety and prevent any accidents.
Compatibility with your vehicle is another essential aspect to consider. Not all ladder racks are designed to fit every type of vehicle. Some racks are specifically designed for trucks, while others are made for vans or SUVs. Make sure to check the compatibility information provided by the manufacturer to ensure that the ladder rack will fit your vehicle properly.
Gathering the Required Tools and Materials
Before you begin the installation process, it’s important to gather all the necessary tools and materials. Here’s a list of items you’ll need:
- Ladder rack kit: This includes all the components required for assembling and installing the ladder rack.
- Wrenches and screwdrivers: These tools will be needed to tighten bolts and screws during the installation process.
- Measuring tape: Use a measuring tape to ensure precise measurements and proper alignment.
- Level: A level will help you ensure that the ladder rack is straight and properly aligned.
- Drill and drill bits: You will need a drill to create holes for mounting the ladder rack.
- Socket set: A socket set will come in handy for tightening bolts and nuts.
- Protective equipment: It’s essential to prioritize safety. Wear gloves and safety goggles to protect yourself during the installation process.
Preparing the Vehicle
Before installing the ladder rack, it’s important to prepare your vehicle. Here are the steps to follow:
- Cleaning the roof: Thoroughly clean the roof of your vehicle to remove any dirt or debris. This will provide a clean surface for mounting the ladder rack.
- Locating the mounting points: Consult the instruction manual or the manufacturer’s website to determine the specific mounting points for your vehicle. These are generally indicated by markings or pre-drilled holes.
- Measuring the distance between the points: Use a measuring tape to determine the distance between the mounting points. This will ensure accurate placement of the ladder rack.
- Marking the positions: Use a marker or pencil to mark the positions where the ladder rack will be mounted. Make sure the markings are visible and properly aligned.
- Ensuring proper alignment: Use a level to ensure that the markings for the mounting points are aligned correctly. This will help ensure that the ladder rack is installed straight and level.
Assembling the Ladder Rack
Before you can install the ladder rack on your vehicle, you need to assemble the various components. Here’s a guide on how to do it:
- Unboxing and inspecting the components: Carefully unbox the ladder rack kit and inspect all components for any signs of damage or missing parts. Contact the manufacturer if you encounter any issues.
- Following the instruction manual: Read the instruction manual provided by the manufacturer and follow the step-by-step guide to assemble the ladder rack. Ensure that you understand each step before proceeding.
- Attaching the crossbars: Start by attaching the crossbars to the vertical supports. Use the provided bolts and nuts to secure them in place. Make sure they are aligned correctly and tightened properly.
- Mounting the vertical supports: Once the crossbars are securely attached, mount the vertical supports onto the crossbars. Follow the instructions provided by the manufacturer for the specific method of attachment.
Installing the Ladder Rack on the Vehicle
Now that you have assembled the ladder rack, it’s time to install it on your vehicle. Follow these steps:
- Aligning the rack with the marked positions: Line up the ladder rack with the previously marked positions on your vehicle’s roof. Ensure that the rack is centered and straight.
- Inserting and tightening the bolts: Insert the provided bolts through the mounting holes on the ladder rack and into the corresponding mounting points on your vehicle. Use a wrench or socket set to tighten the bolts securely.
- Securing the rack to the mounting points: Once the bolts are tightened, ensure that the ladder rack is securely attached to the mounting points. Give it a gentle shake to check for any movement or instability.
- Double-checking the stability: Take a step back and visually inspect the ladder rack to ensure that it is properly aligned and stable. If you notice any issues, double-check the installation and make adjustments as necessary.
Adjusting and Securing the Ladder Rack
After the ladder rack is installed, it’s important to adjust and secure it properly to ensure your safety and the safety of others on the road. Here’s what you need to do:
- Ensuring proper alignment: Use a level to check the alignment of the ladder rack once again. Make any necessary adjustments to ensure that it is straight and level.
- Tightening all bolts and nuts: Go over all the bolts and nuts on the ladder rack and tighten them securely. This will help prevent any movement or looseness during transportation.
- Verifying the stability: Give the ladder rack a firm shake to verify its stability. It should feel secure and stable, without any noticeable movement.
- Making necessary adjustments: If you notice any issues or instability, make the necessary adjustments to the installation. Double-check all the components and connections to ensure everything is properly secured.
Testing the Ladder Rack
Before using the ladder rack to transport any heavy equipment or materials, it’s important to test its stability. Here’s how you can do it:
- Placing a test load on the rack: Place a reasonable test load, such as a sandbag or a dummy weight, on the ladder rack. Make sure that the weight is evenly distributed and within the weight capacity of the rack.
- Checking for any signs of instability: Carefully observe the ladder rack while the test load is placed on it. Look for any signs of instability, such as excessive movement or sagging. These signs may indicate that adjustments or additional support are needed.
- Adjusting if necessary: If you notice any instability or signs of weakness, make the necessary adjustments to the ladder rack. This may involve tightening bolts, redistributing the load, or considering additional support options.
Maintenance and Safety Considerations
In order to ensure the longevity and continued safety of your ladder rack, it’s important to follow these maintenance and safety considerations:
- Regularly inspecting the rack: Take the time to inspect the ladder rack on a regular basis. Look for any loose bolts or damaged components that may compromise its stability. Address any issues promptly.
- Checking for loose bolts or damage: Ensure that all bolts and nuts on the ladder rack are tightened securely. Additionally, inspect the components for any signs of damage, such as cracks or dents. Replace any compromised parts as soon as possible.
- Cleaning and lubricating moving parts: Keep the ladder rack clean and free from debris. Additionally, lubricate any moving parts, such as hinges or sliding mechanisms, to ensure smooth operation.
- Following weight capacity guidelines: Always adhere to the weight capacity guidelines provided by the manufacturer. Overloading the rack can pose serious safety risks and cause damage to your vehicle.
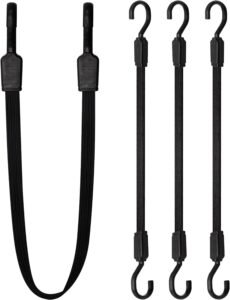
- Securing the ladder properly: When placing a ladder on the rack, ensure that it is securely fastened. Use bungee cords or straps to prevent any movement during transportation.
Seeking Professional Assistance
While installing a ladder rack may be a manageable task for some, it’s important to recognize when professional assistance is necessary. Here are a few instances where seeking professional help may be beneficial:
- Considering professional installation: If you are unsure about your abilities or lack experience with installing ladder racks, it’s wise to consider professional installation. This ensures that the rack is installed correctly and safely.
- Getting help if uncertain: If you come across any difficulties or uncertainties during the installation process, don’t hesitate to seek help from a knowledgeable individual or professional.
- Consulting with experienced professionals: If you have any questions or concerns about the installation process or the specific ladder rack you are using, consult with experienced professionals who can provide guidance and advice.
Conclusion
Installing a ladder rack on your vehicle can greatly increase its versatility and functionality. By choosing the right ladder rack, gathering the necessary tools and materials, and following the proper installation process, you can ensure a secure and stable setup. Remember to prioritize safety, regularly inspect the rack, and follow the weight capacity guidelines. If you’re unsure about the installation process, consider seeking professional assistance. With the right ladder rack installed, you’ll be well-equipped to transport equipment and materials with ease.


